OctoPrint: Difference between revisions
From TSAS Library
JStallings (talk | contribs) No edit summary |
JStallings (talk | contribs) No edit summary |
||
| Line 1: | Line 1: | ||
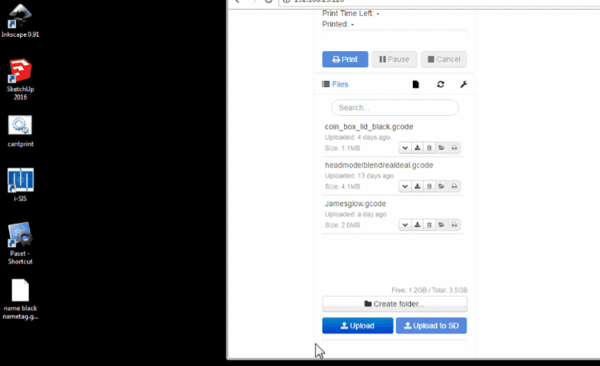
[[File:GcodeUpload.gif|right|600px|Uploading .gcode file to OctoPrint for remote printing]] | [[File:GcodeUpload.gif|right|600px|Uploading .gcode file to OctoPrint for remote printing]] | ||
# We use OctoPrint to control the printer remotely. If you are using a personal computer with Bonjour service installed, connect to the school's wifi and go to [octopi.local] | # We use OctoPrint to control the printer remotely. If you are using a personal computer with Bonjour service installed, connect to the school's wifi and go to [octopi.local] | ||
# Login with your credentials. Ask Stallings for yours | # Login with your credentials. Ask Stallings for yours | ||
| Line 9: | Line 10: | ||
# Head to the printer and watch the first few layers for errors | # Head to the printer and watch the first few layers for errors | ||
# Take a picture of your creation and upload it to the [[3D Print Gallery]] | # Take a picture of your creation and upload it to the [[3D Print Gallery]] | ||
For further inspiration, check out the [[Creating a Model to Print]] and [[3D Model Sources]] pages. If you come across something not listed, please add it! | For further inspiration, check out the [[Creating a Model to Print]] and [[3D Model Sources]] pages. If you come across something not listed, please add it! | ||
Latest revision as of 22:05, 18 March 2021
- We use OctoPrint to control the printer remotely. If you are using a personal computer with Bonjour service installed, connect to the school's wifi and go to [octopi.local]
- Login with your credentials. Ask Stallings for yours
- Open the folder on your computer containing the .gcode file you created with Cura
- Drag the file into the left of the OctoPrint screen
- You should see the file appear in the Files list on the left side of the screen.
- Click your file to load it. If there are errors, do not print the file!
- If there are no errors, click the Blue print button to begin printing
- Head to the printer and watch the first few layers for errors
- Take a picture of your creation and upload it to the 3D Print Gallery
For further inspiration, check out the Creating a Model to Print and 3D Model Sources pages. If you come across something not listed, please add it!
| 3D Print Training Series |
|---|
| Previously: Slicing 3D Print Files |
