DIY T-shirts
From TSAS Library
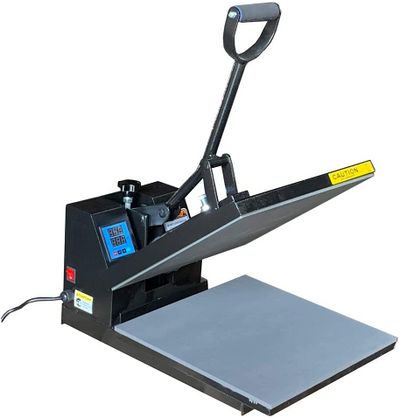
The library offers two tools to help you make a t-shirt: the vinyl cutter and the heat press. Single-color designs are easiest to make, though in theory it is possible to create logos with multiple colors.
How to create your t-shirt
- Follow the instructions on the vinyl cutter page to cut out your mirrored image from heat-press vinyl. The shiny side goes against the carrier mat—you'll cut the non-glossy side with the cutter
- Carefully remove extra vinyl from around your design
- If needed, use the boards under the press to straighten your shirt/cloth and place your design onto the t-shirt/cloth with the clear plastic facing up
- Test the press's pressure while cold:
- Put your shirt and design (and board) into the press
- Pull the handle down until it locks, then use the upper and lower handles to open it
- It should take effort to open. If it doesn't, twist the knob on top and press again until you almost can't release the press
- Open the press and heat to 285-300 degrees (check vinyl package for correct temperature)
- Place the gold teflon sheet on top of your design
- Press and wait 15 seconds
- Release the press, remove the teflon sheet, and slowly peel away the clear plastic
- If your design hasn't fully stuck, press it again for 10-15 seconds
- If your design is fully stuck, congrats!
- Unplug the machine and return all tools to their proper location
