Laser
Our Laser
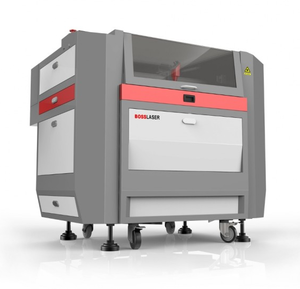
TSAS has a 100w Boss LS-1630 laser with a cutting capacity of 400 x 750mm or 15.75" x 29.50", with pass-through windows. This means that if your project is larger in one dimension (like a 25" wide surfboard), it will fit inside the machine—we'll just need to cut/engrave in multiple sections.
Materials
In general, if your material is 1/4" (6.35mm) or thinner, the information below applies. The machine is capable of cutting up to 3/5", but see Stallings before planning a project with very thick material.
Things it can cut
- Wood: plywood, hardwood, MDF, cardboard, paper, cork
- (Some) plastics: acrylic, delrin, mylar
- Leather, cloth
- Magnet sheet
Things it can engrave
- All from the cut list—if it can be cut, it can be engraved.
- Metal
- Glass
- Rock
- Tile
- Anodized aluminum
Things it can NOT cut or engrave
- Lexan (fire)
- PVC (puts off chlorine gas)
- Epoxy (fire)
- Polystyrene or polypropylene foam (fire)
- ABS (melts)
Material Resources
- Plastic Engineering Company of Tulsa (local)
- Tulsa Plastics (local)
- Regal Plastic (local)
- Johnson Plastics Plus (online)
- Ocooch Hardwoods (online)
- Trotec Engraving Supplies (online)
Creating a Project
If you are on a desktop computer, your best choices for creating a vector design are Inkscape (free, open source) or Fusion 360 (free for our use). Stallings would love to walk you through either one.
Note that all fonts should be turned to paths. In Inkscape, use the Path > Object to Path tool. You can double-check by double-clicking on your text—if nodes appear, you're good.
If you are on a Chromebook, check out Cuttle a vector creation program that we pay for. If you're familiar with TinkerCAD, that will work, but your shapes must intersect with the floor in order to export properly. Also check out Vector Resources for more images.
Fabricating Your Project
There are two parts to fabricating a laser project: LightBurn software setup and machine setup.
LightBurn Setup
Bring your svg file to the laser's computer and open in LightBurn.
The grid that you'll work on has the same dimensions as the laser bed, and the location of your image on the grid corresponds to its location on the bed. Highlight the entire project (ctrl + a) and resize if necessary, paying attention to the size of your materials.
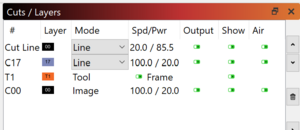
If you used color in your image, you'll notice that all fill has been removed and a list of colors has appeared in the cuts/layers box. In Lightburn, each line's color represents a different type of laser action (cut or engrave) and different speeds and power. We usually color cut lines black and engraved lines blue. Select the lines you want to cut, then choose black along the bottom. Repeat the process for any engraved lines, choosing blue.
Align your project in the upper right corner. A margin of .3" is good to avoid the edges of the machine. Double-check the scale of your design, as well.
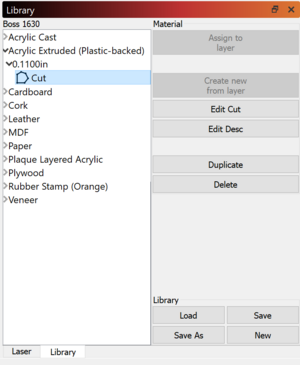
Once your project is in the right position, colored, and scaled correctly, you'll need to tell the machine what kind of material it will be cutting. On the bottom right is a Library tab containing all common materials. Find your material (say, Acrylic Extruded [Plastic Backed]) and thickness (3mm or .11"), then choose the laser action to assign to lines of a certain color. Select the black "Cut Line" layer up top, then choose "Assign to Layer." This will update the Cut Line settings for your material. Repeat this process for engraving.
Machine Setup
Open the machine and place your material in the upper-right corner. It should sit against the ruler.
Turn on the machine, chiller, compressor, and ventilation fan at the power strip behind the computer.
Use the arrow buttons on the laser to move the head anywhere over your material, then press the Z/U key. Locate "Auto Focus" and press Enter. The bed will move toward the laser head and measure your material's thickness to properly focus.
Move back to the computer and press the Frame button in the Laser tab. The machine will draw a precise rectangle the size of your image on your material. If everything is in the correct place, close the lid of the laser and press Start in LightBurn.


